In this article
Using pre-population
Overview
Pre-population allows you to automatically fill in survey answers with information you already know about respondents. This can save time, improve accuracy, and help you customise the survey experience for each individual.
Using pre-population, you can:
Save time: Automatically fill in details about respondents, reducing their need to type.
Review information: Allow respondents to check and update details you already have on file.
Customise survey flow: Pass values into questions that control survey logic to show or hide questions based on previous answers.
Step 1: Setting up pre-population parameters
To begin, you’ll need to define the parameters (data points) you want to automatically pass into the survey. Here’s how:
-
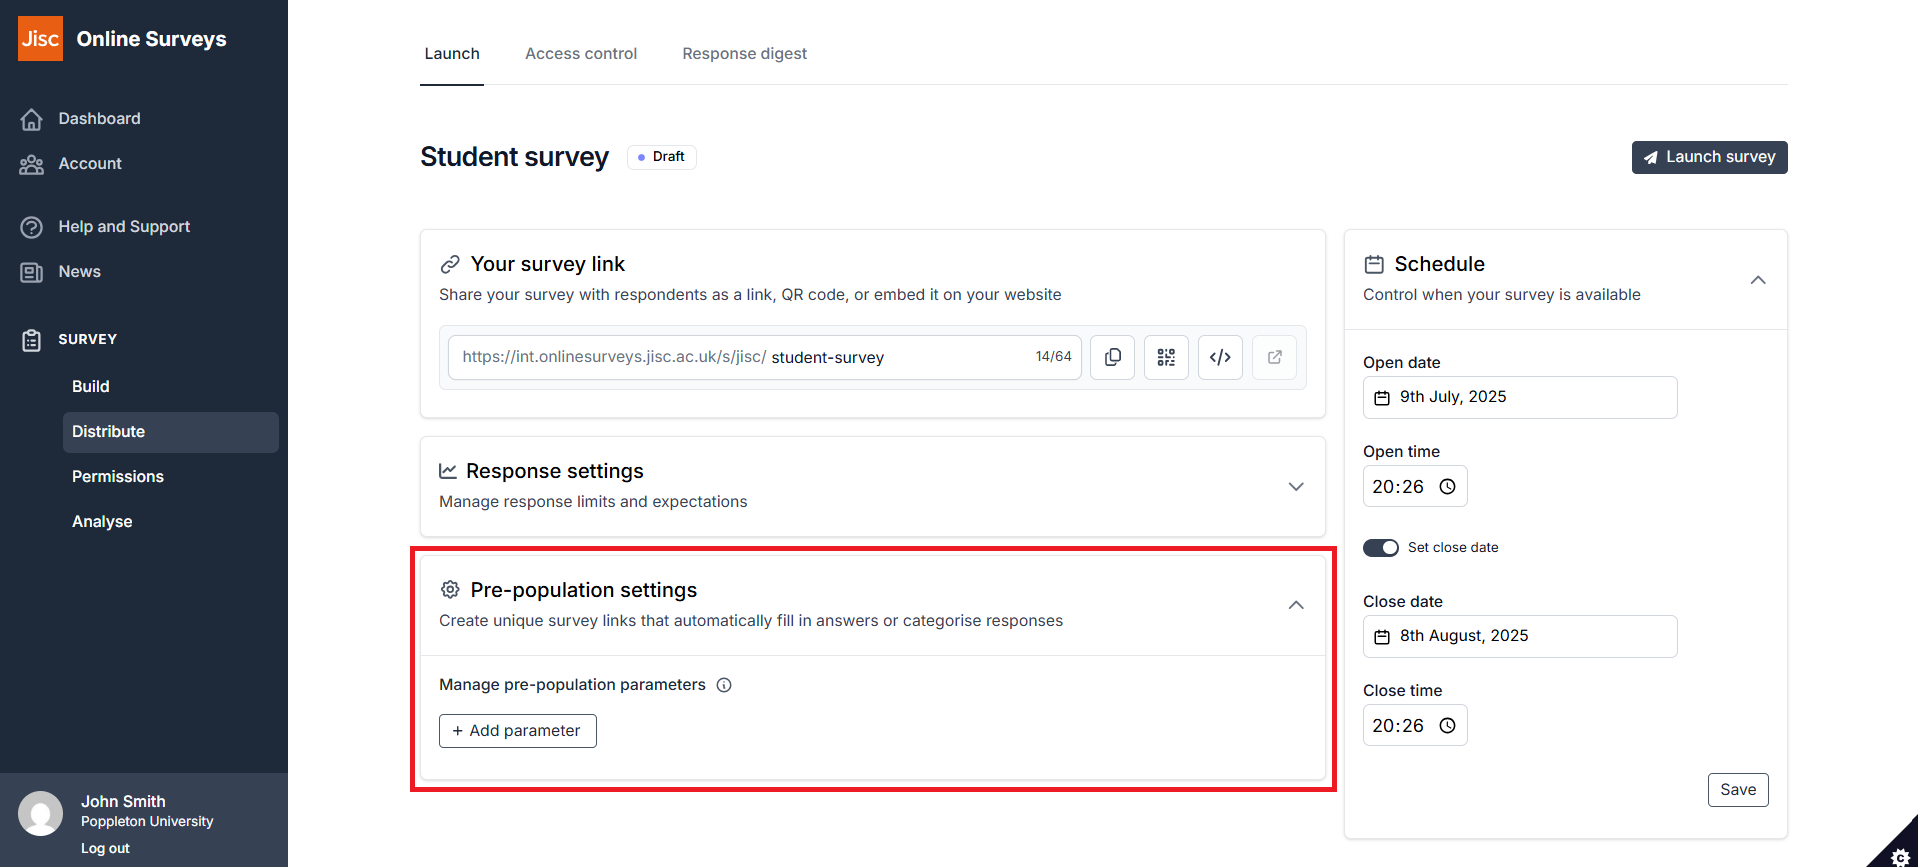
Go to the Distribute area of your survey.
Click the Launch tab.
-
Expand the Pre-population settings section.
-
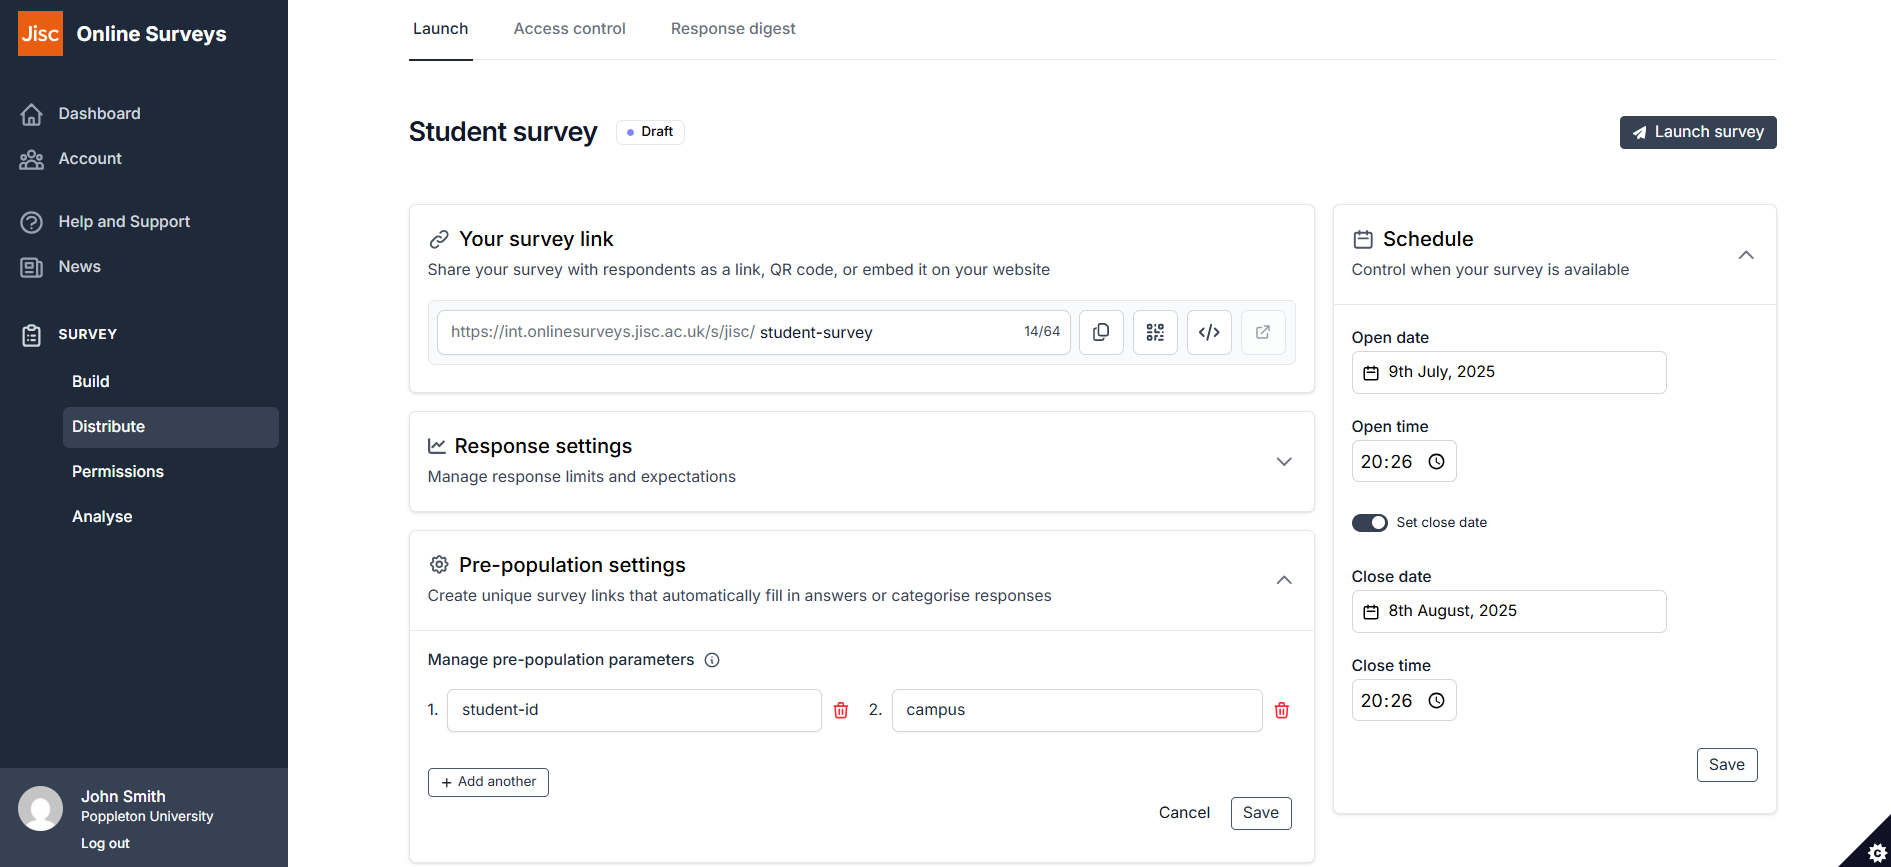
Click Add Parameter and give your parameter a brief, meaningful name (for example, if you want to pass in a student ID, label your parameter “student-id”). You can add multiple parameters as needed by clicking Add Another.
-
Save your parameters.
Tip: Keep parameter names short (max 25 characters) and descriptive to avoid confusion.
Step 2: Setting up questions for pre-population
Next, you’ll need to specify which questions will be pre-populated with the data you’ve defined. Here’s how:
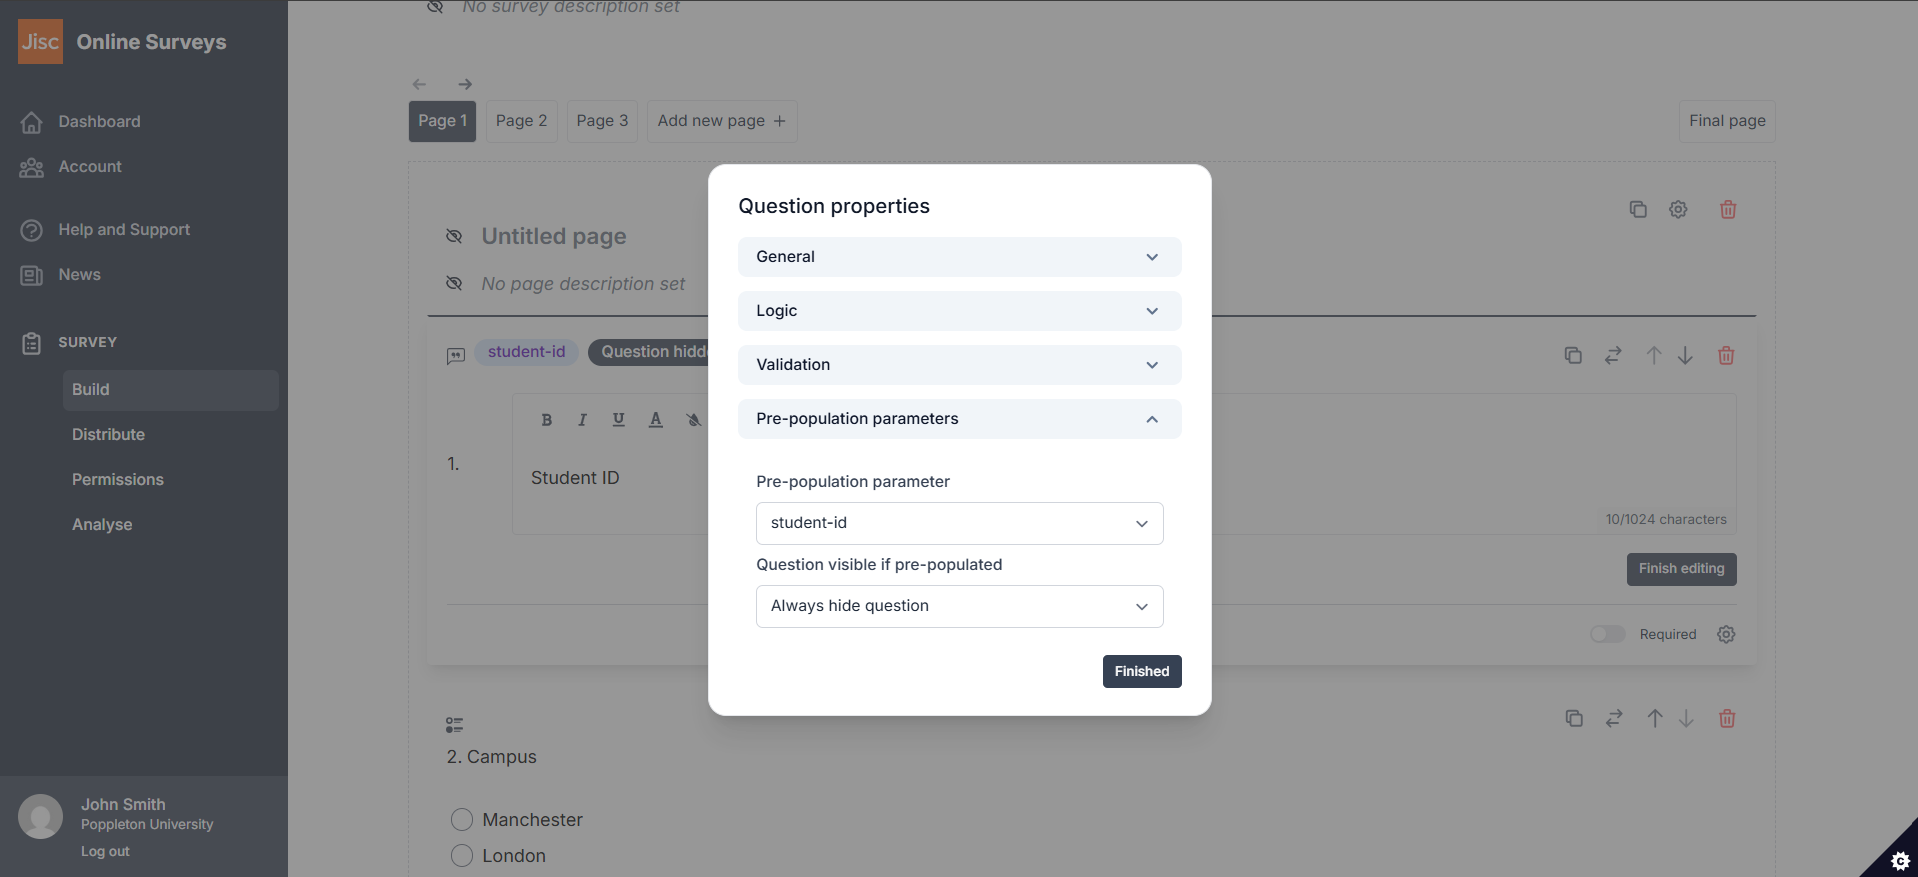
Go to the Builder.
Choose the question you want to pre-populate.
In the Question properties (click the cog icon), expand the Pre-population Parameters section.
Select the Pre-population parameter you want to use to populate this question.
Choose a Visibility option for the question:
- Always show question: The question and pre-filled answer are visible and can be edited by the respondent.
- Always hide question: The question is hidden, and the pre-filled answer is not shown to the respondent.
- Hide if parameters supplied: The question will only appear if there is no pre-filled answer for that particular respondent (if you think you’ll have gaps in your pre-population data, choose this option).
Step 3: Assigning pre-population values to respondents
Now that you have set your survey up so that pre-population values are passed into your questions, you need to ensure that the links your respondents use to access the survey pass those values in. There are two ways that this can happen:
Option 1: Upload the values into a respondent list
If you are going to use Access Control, you can upload the pre-population values along with your respondent list – each respondent will be assigned their individual values to populate your questions.
Option 2: Generate URLs on the fly for public surveys
If you are distributing a public survey, you can generate URLs to include a query string that will pass the correct values to your questions.