For additional survey security and monitoring you can use Access control to set up a list of individual respondent details. This will:
- Let you create personalised survey links for your respondents (or issue respondents with respondent IDs and passwords, if preferred).
- Allow you to email the survey links to your respondents straight from Online Surveys.
- Ensure that each respondent can only complete your survey once.
- Give you a record of who has and who hasn’t yet completed your survey so you can send a reminder.
- Pre-populate answers with information you already have about a respondent.
Using Access control to add a respondent list
To set up a respondent list:
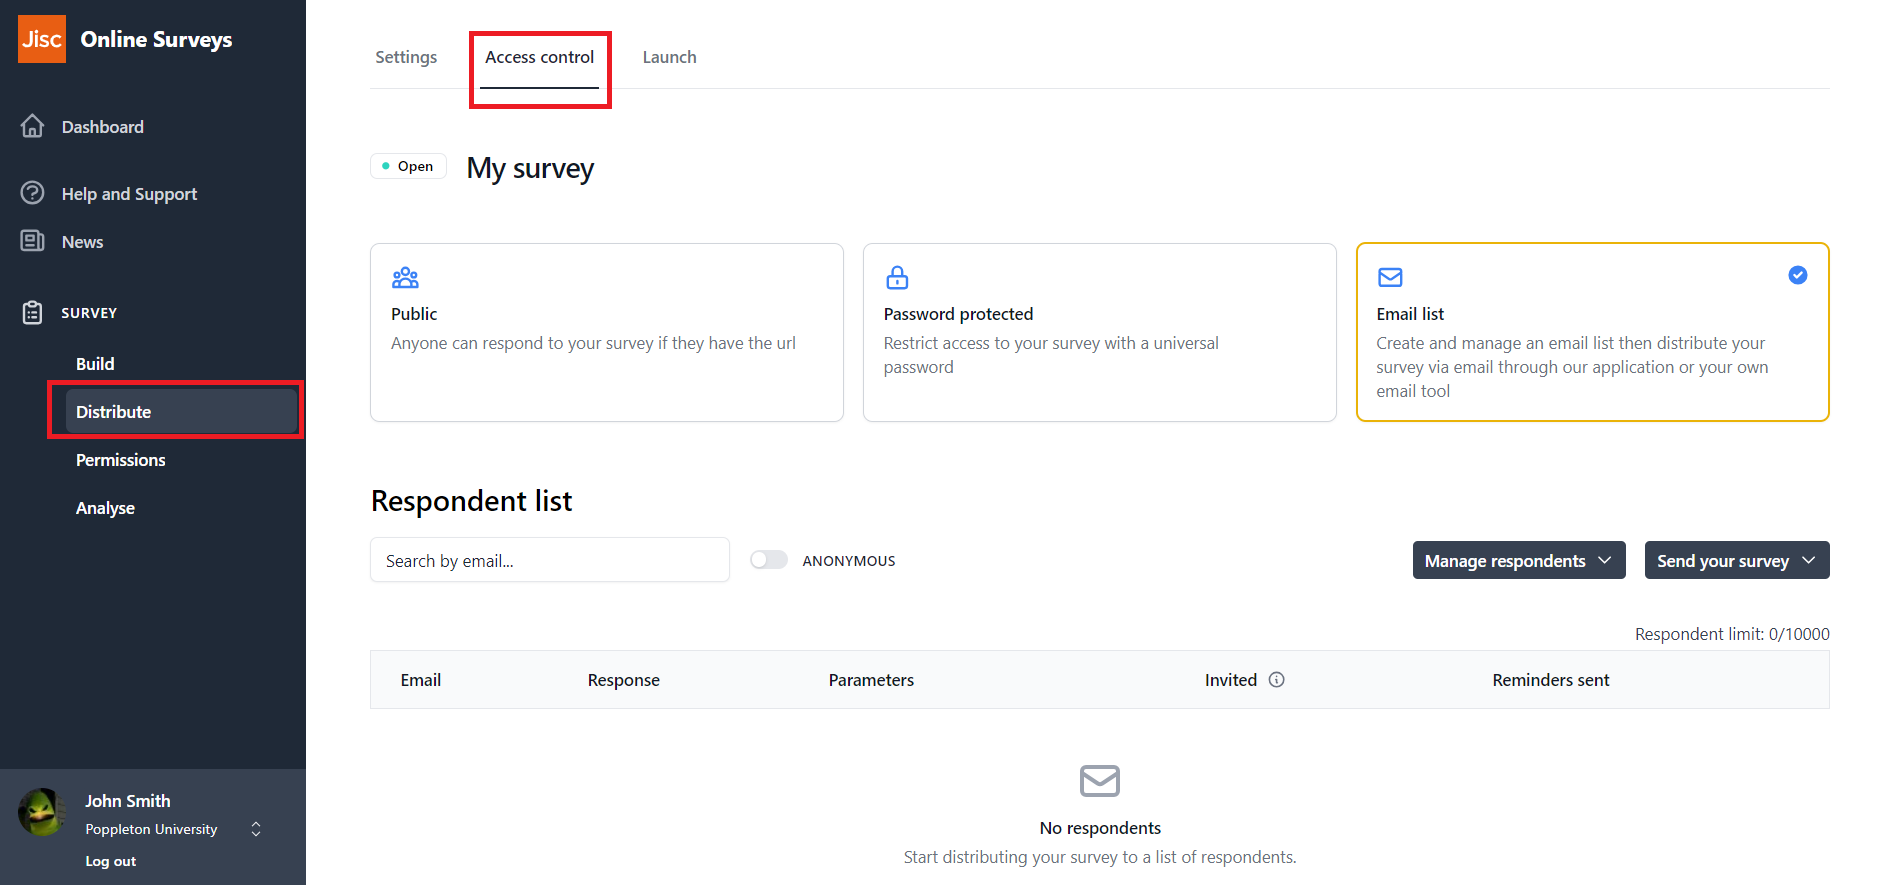
- Go to the Distribute area of your survey.
- Choose the Access control tab.
- From the three cards displayed, choose Email list.

Adding a single respondent
To add a single respondent to your list:
- Expand the Manage respondents menu.
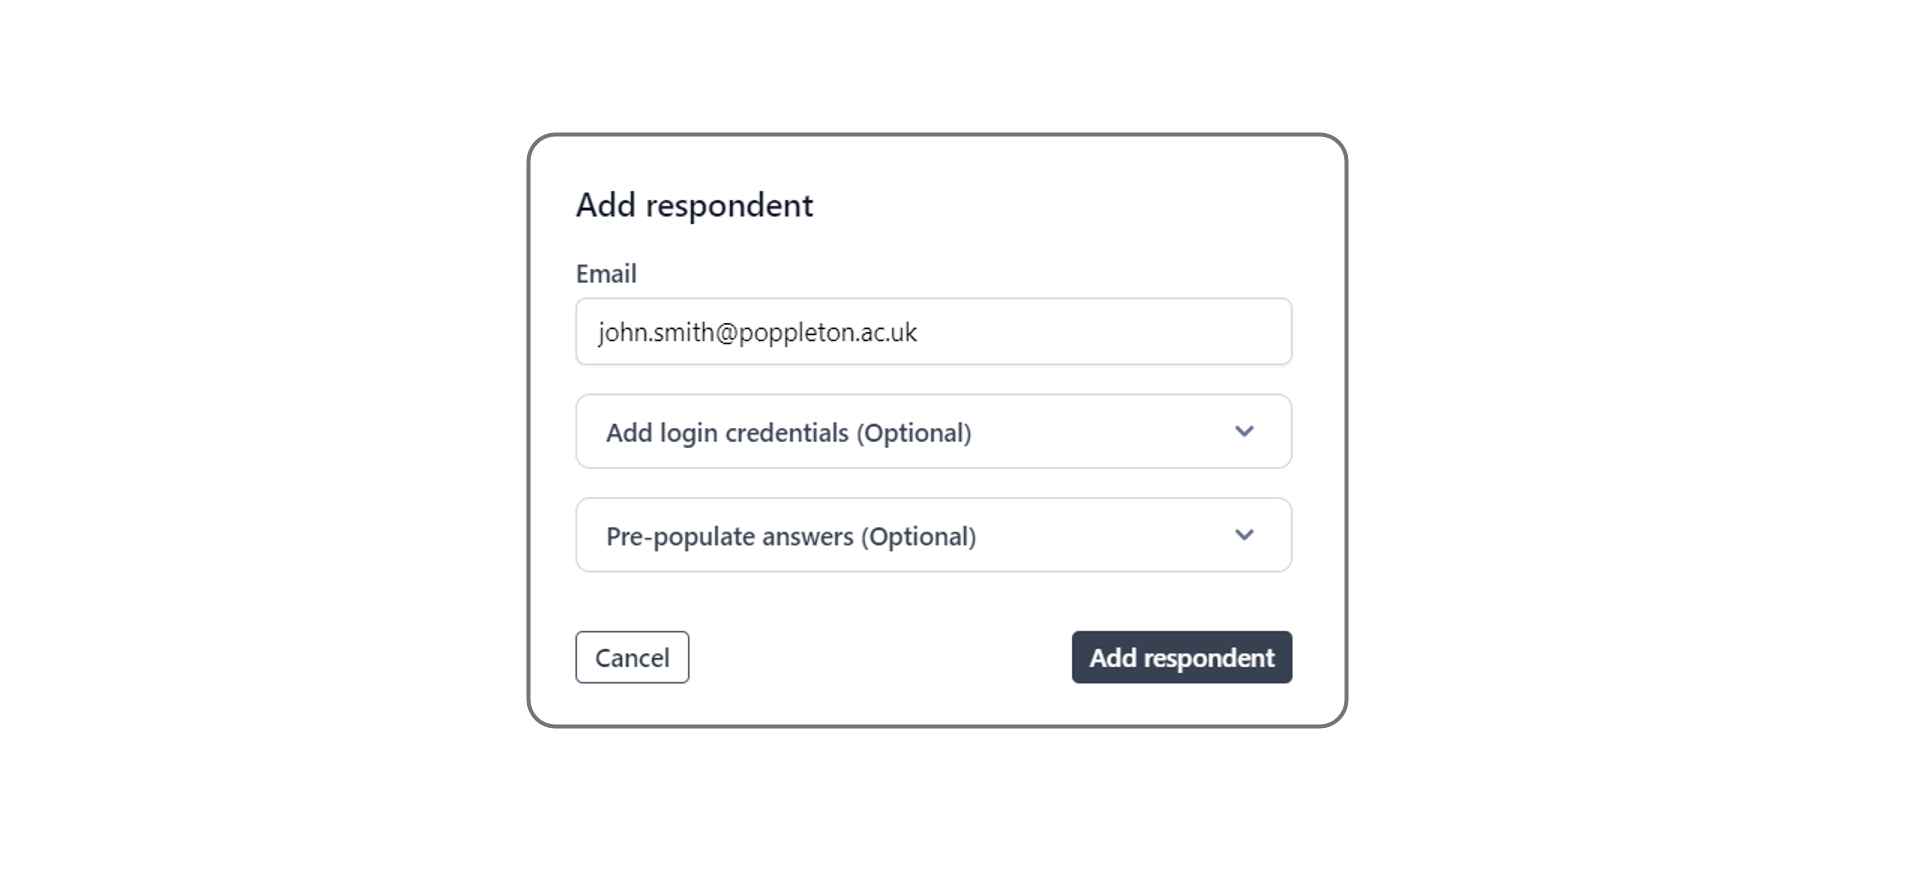
- Click Add single.
- Enter the email address of your respondent (required).
- Add a custom Respondent ID and Password for your respondent (optional – see below).
- Add any pre-population values if applicable. (See our help page on pre-population for more information.)
- Click Add respondent.

Adding multiple respondents
To add a multiple respondents to your list:
- Expand the Manage respondents menu.
- Click Add / edit multiple.
- Browse for your csv file.
- Click Upload.
Formatting your csv file
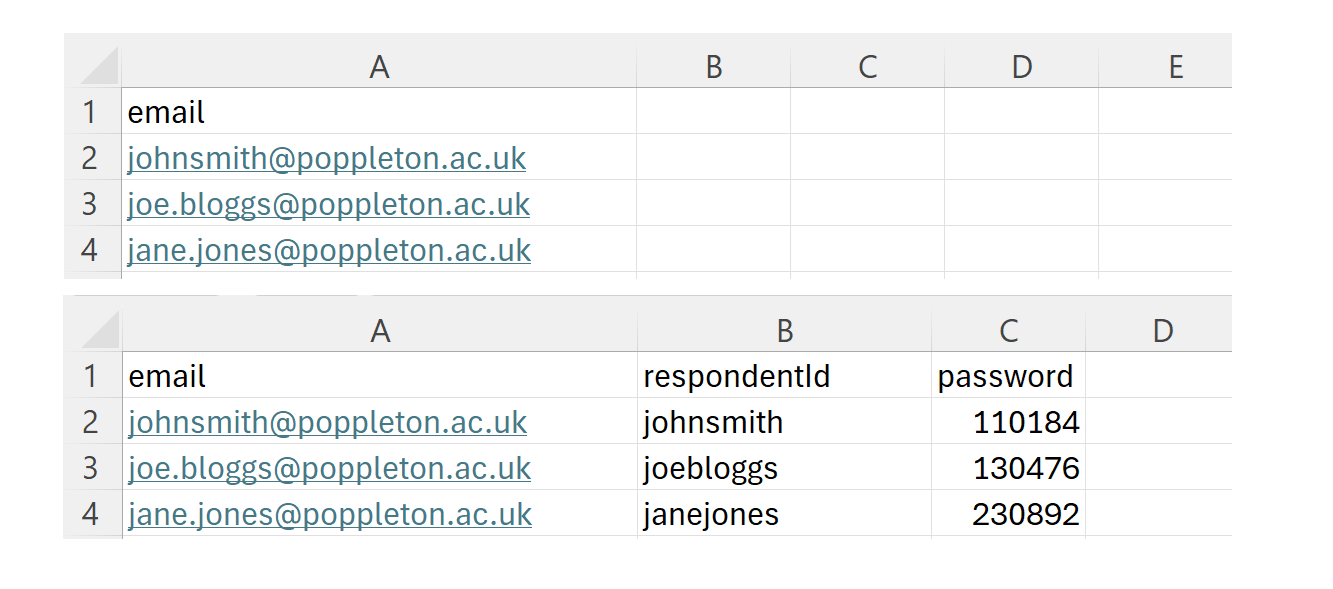
As a minimum your csv file should contain:
- Column A: headed ’email’ with your respondents email addresses in that column.
Optionally:
- Column B: headed ‘respondentId’ with your custom respondent IDs in that column
- Column C: headed ‘password’ with your custom respondent passwords in that column.
- Column E onward: headed with your pre-population parameter labels with your pre-population values in those columns. (See our help page on pre-population for more information.)

Adding a custom respondent ID and password
You can add a custom respondent ID and password for each of your respondents, either through the Add single or Add multiple functions as described above.
If you only intend to issue unique links via email, then you can ignore this optional setting.
If you wish to issue the survey’s public URL and provide a login page for your users, then you might want to add custom respondent IDs and passwords that would be meaningful to your respondents.
As a default, your respondents will always be assigned a respondent ID and password. Without adding a custom pair, your respondents’ IDs will be their email addresses and the passwords will be randomly generated.
Further help and support
Launching your survey
This help page details how launch your survey.
Read MoreCustomising your survey’s URL
This help page explains what your survey short name is and how to change it to customise your survey's URL.
Read MoreDownloading a QR code for your survey
This help page details how generate and download a QR code for your survey.
Read MoreEmbed a survey in your website
This help page details how to embed a survey using an iframe.
Read More