Logging into Online Surveys
Online Surveys uses passwordless technology, so no passwords are stored on the platform.
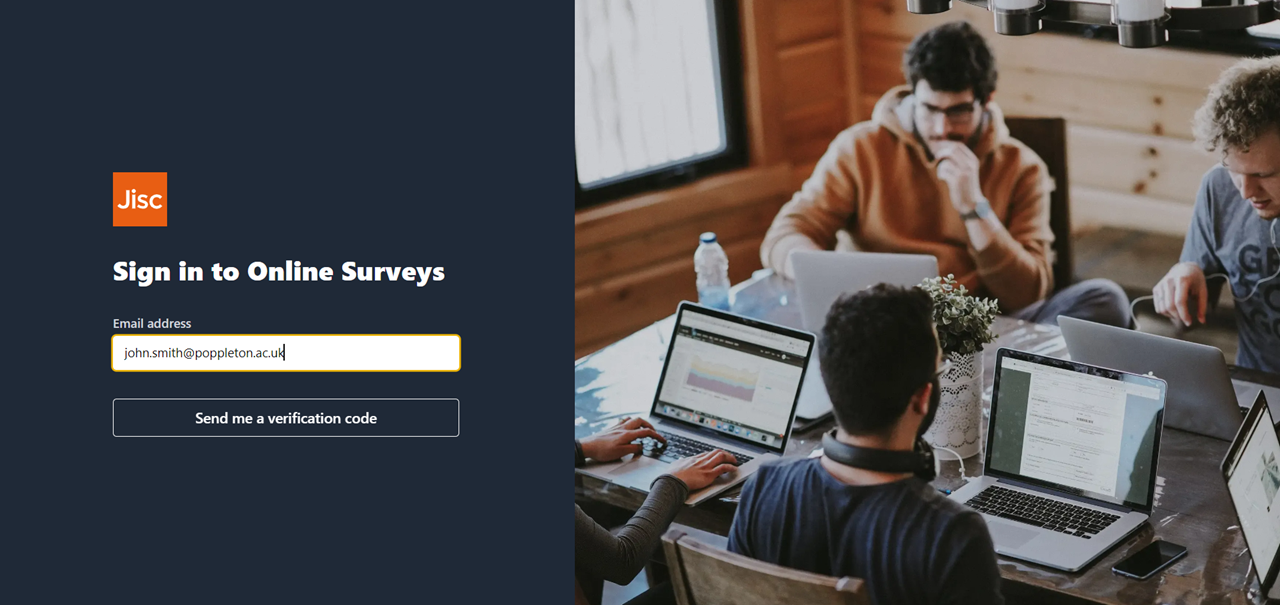
To sign in, navigate to Online Surveys at app.onlinesurveys.jisc.ac.uk.
Enter your registered email address and click ‘Send me a verification code.’
Check your inbox to find your authentication email. Either click the ‘Login to Online Surveys’ button or copy the verification code and paste it into the Online Surveys Login page. Please check your emails junk mail if you do not receive an email.
As there are no passwords, you just repeat this process each time you want to log in.
Accessing your survey templates
You will receive your survey templates by email. You’ll get one email for each survey you have asked Advance HE to run.
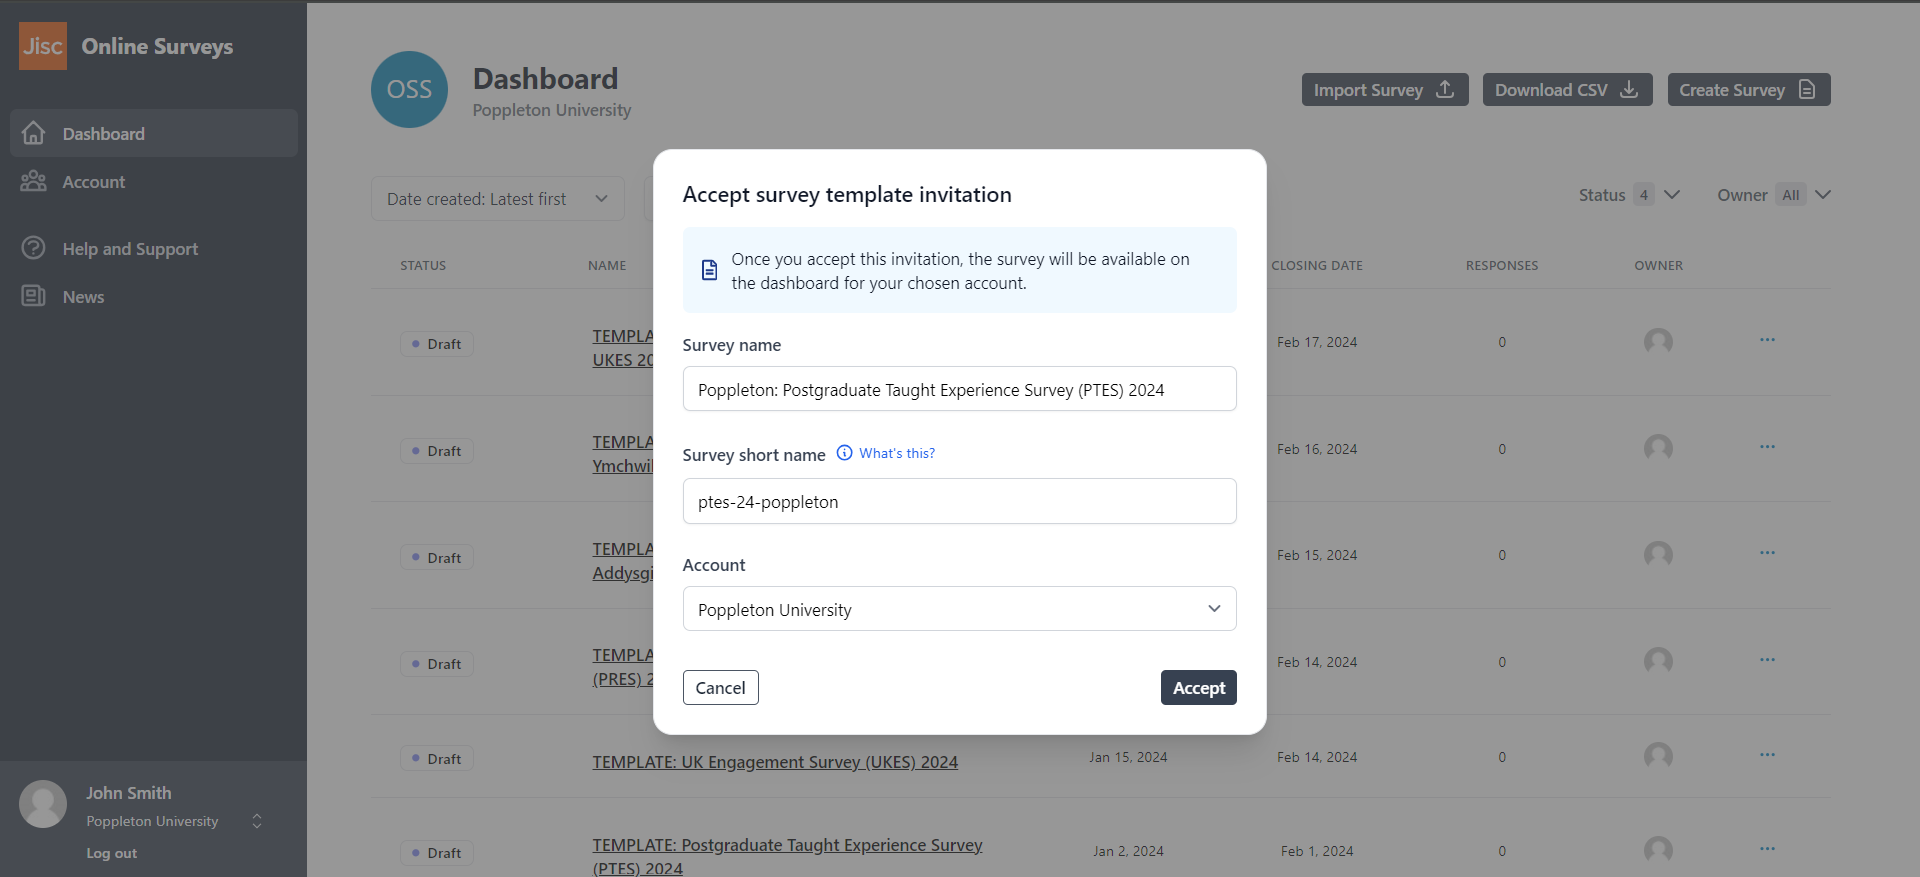
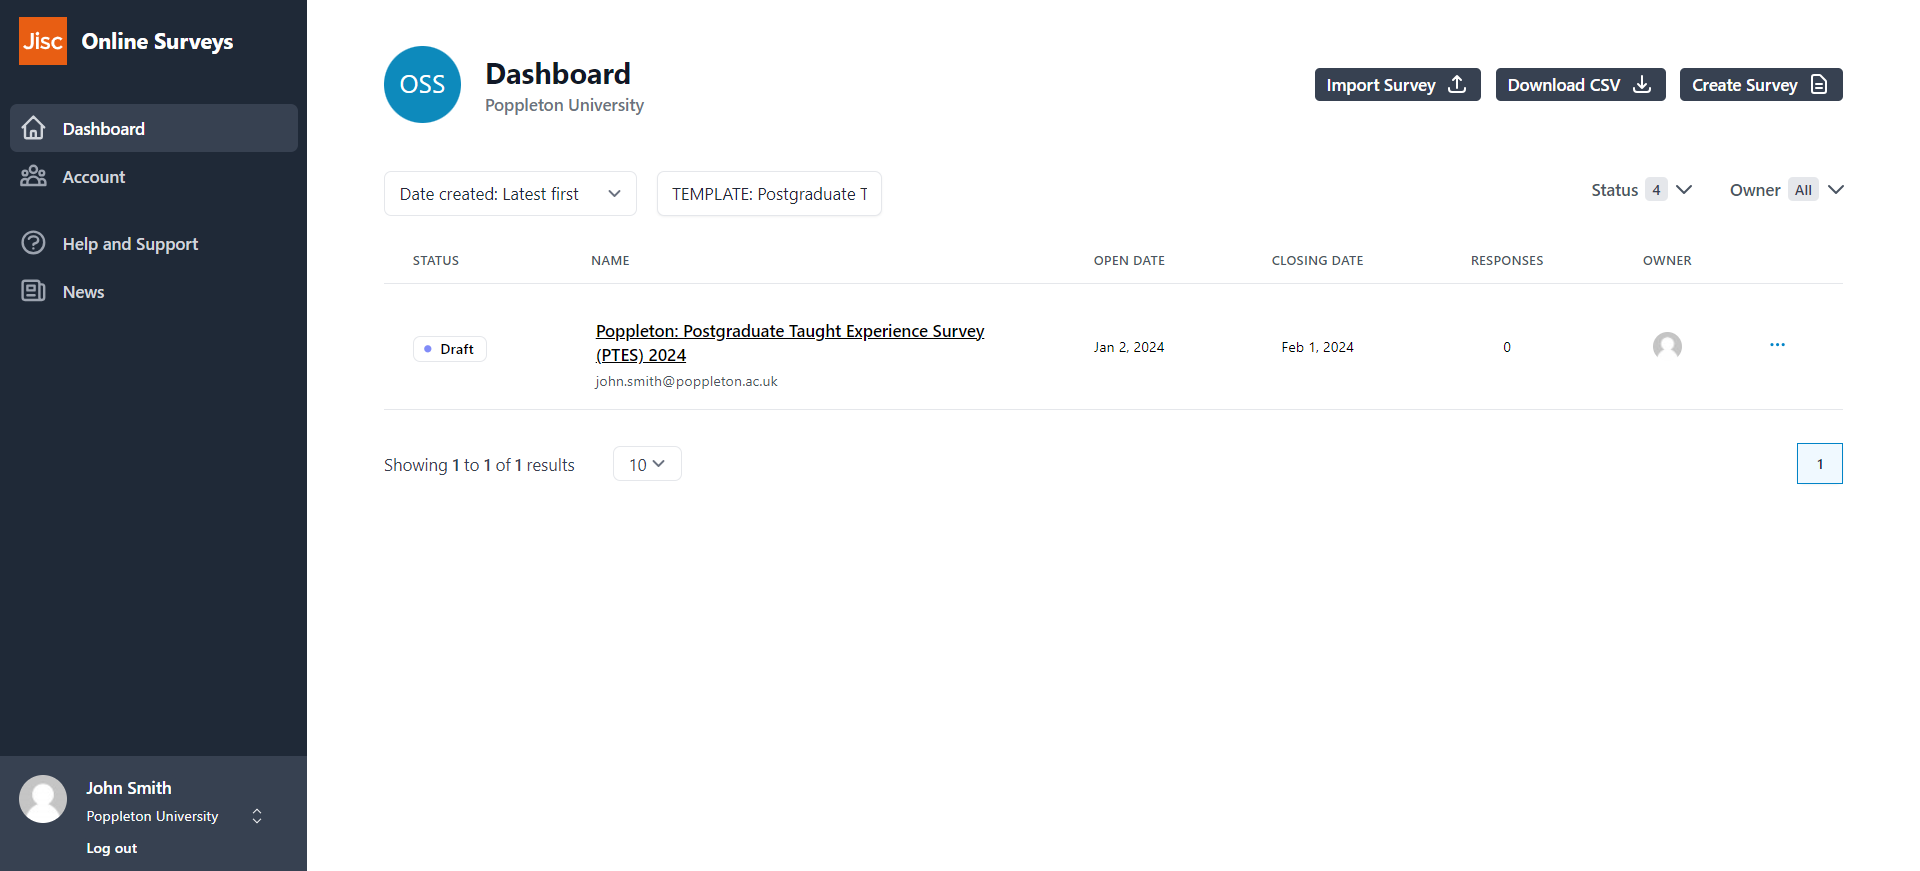
For each survey, click the ‘Accept survey template’ button in the email. You will then be taken back to Online Surveys and prompted to choose:
Your survey name: you should remove ‘TEMPLATE’ and append your institution’s name.
Your survey short name: this will form part of your survey’s URL (the bit that’s unique to your survey), so make it meaningful, as your participants will see it, e.g. ‘pres-poppleton.’ This will need to be lower case and only include characters that are permiited in URLs.
Account: Choose your account.
Survey menu
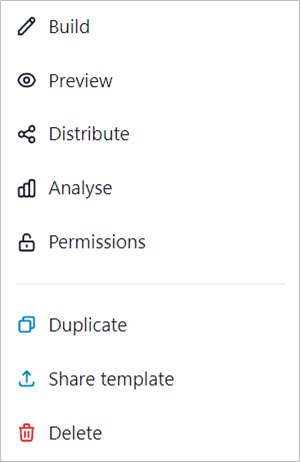
To access the survey actions menu click the three dots at the end of the survey row. This menu will help you find your way around your survey.
- Build - edit the survey and change its completion settings.
- Preview - see your survey as a respondent would see it.
- Distribute - change your distrbution settings, upload your respondent list, and launch your survey.
- Analyse - view and export your survey responses.
- Permissions - create permissions for other users to work on your survey.
- Duplicate - create a duplicate of your survey.
- Share template - share a duplicate of your survey by email with another user.
- Delete - permenently delete your survey.
Editing your survey
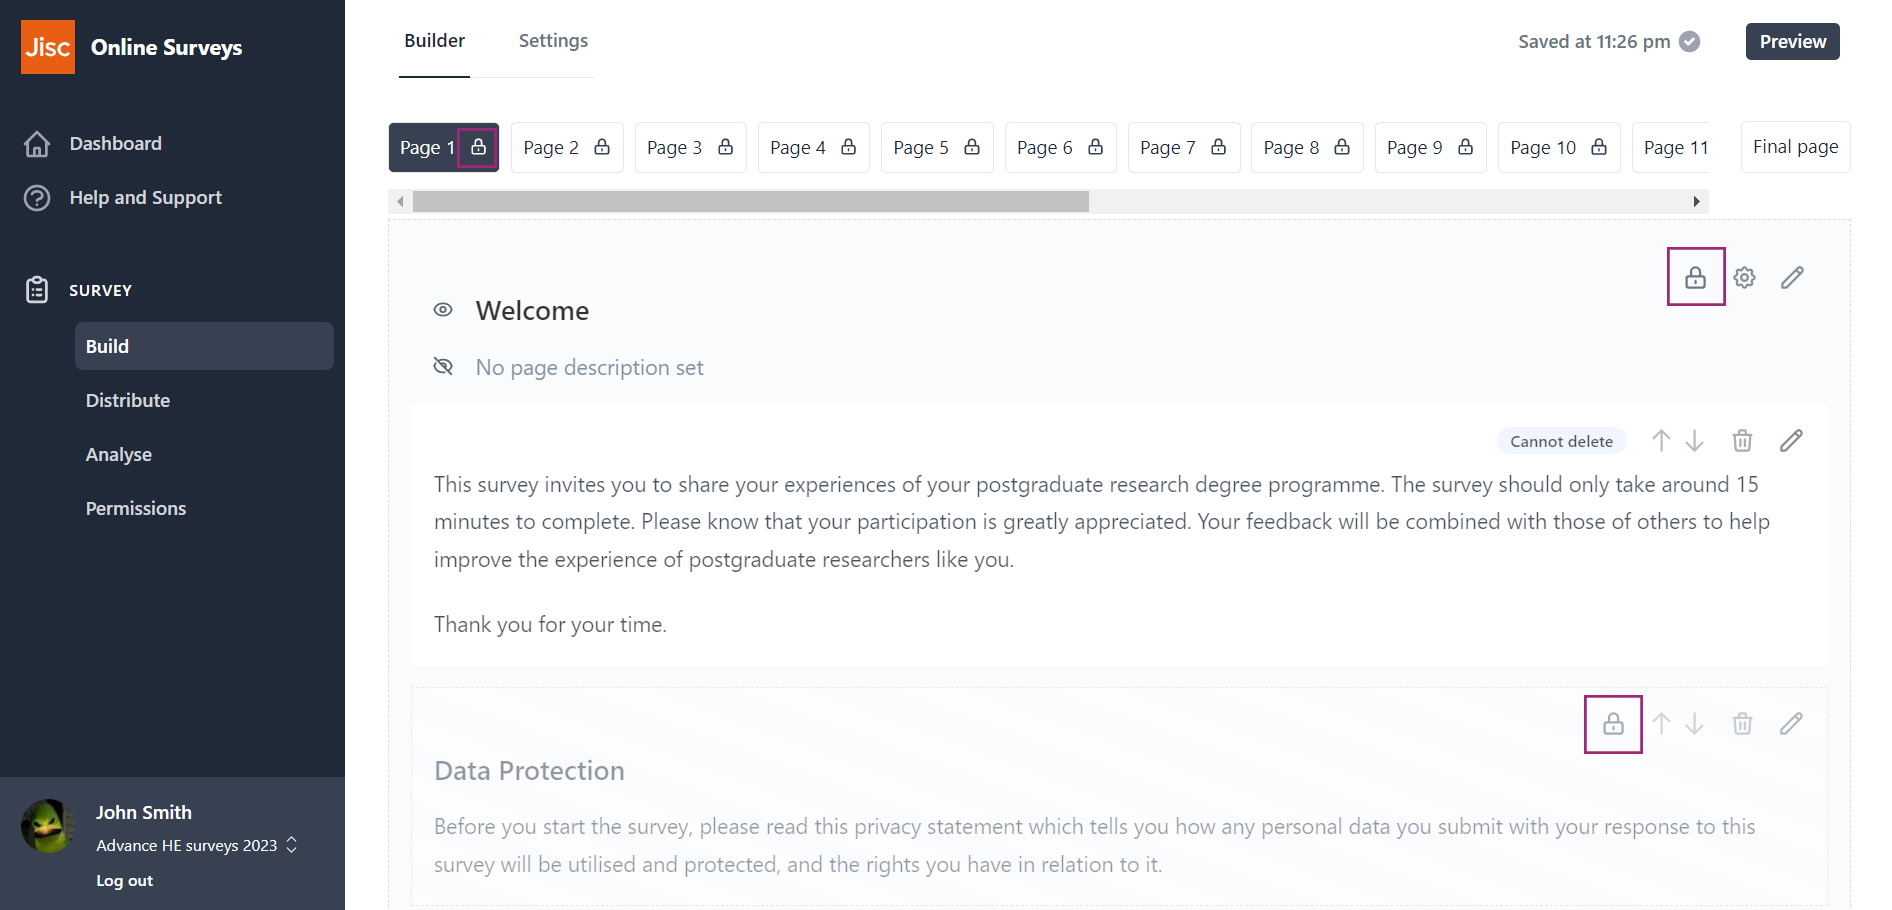
To edit your survey, choose ‘Build’ from the survey actions menu.
Any page, question or note in the survey that is locked (cannot be edited or deleted) is indicated by a padlock icon.
For PTES and PRES, the core set of questions cannot be edited or deleted. For UKES, there are some pages and questions that can be deleted if you don’t want to use them.
There are four key editing tasks to undertake. Each is outlined in the accordion below.
There are three editable note sections on page one of each survey. These three sections do not have lock icons displayed, and can be edited using the pencil icon.
The first editable section is the welcome note. You can include information specific to your institution, like a prize draw, or letting students know how the results of your institution’s PRES/PTES/UKES survey will be made available to them after the survey has closed. Advance HE recommends adding the name of an institutional contact or sponsor at the end of the welcome note.
The second editable note is under the Data Protection heading and is a space to provide a hyperlink to your privacy statement. You are required, as the data controller, to inform participants, via a privacy statement, how any personal data submitted with the responses will be utilised and protected, and the rights respondents have in relation to it. The privacy statement should also explain the role of Advance HE and Jisc as data processors, and should provide for Advance HE to be able to share the data with sub-processors working on its behalf.
The data protection section then includes a locked question to obtain respondent consent for their responses to be used in the way described in the privacy statement.
The third editable note requires you to amend the support sentence; “You can withdraw your consent at any time in the future by contacting [institution to insert appropriate contact details].” to include appropriate information. The guidance on completion includes signposting towards pastoral support.
For UKES, all free text questions on pages 1-6 (Qs 3, 5, 7, 9, 12) can be deleted if you do not wish to use them.
Additionally, any questions on pages 7-10 can be deleted, or you can choose to delete the pages entirely.
Deletable questions will be greyed out like locked questions but will be have an active delete button (and are denoted by a ‘Cannot edit’ label instead of a lock icon).
Pages that can be deleted will not display a padlock icon.
Remember that any deletion of pages and questions, although two-step, will be permanent. If you make a mistake you will need to create a new copy of your survey using the original template email you received.
Note: in PTES and PRES, all core questions are locked, so cannot be edited or deleted at all. Although, in some instances, logic or pre-population determines pages or questions that will be skipped by respondents.
Page to add institutional-specific questions can be added at the end of the survey by using the ‘Add new page’ button.
See our Questions help page to find out what question types are available and how to add them.
If you would like to pre-populate any of your institutional questions, see Using pre-population parameters.
The final page will appear for the respondent after they have submitted their response. There is a text section here that you can edit to signpost to relevant support or contacts. If you choose to capture respondent details for a prize draw in a separate survey, you can put your URL in here.
The final page is also where respondents can download their responses or there response ID. You can determine whether the respondent is able to see these actions in the ‘Survey settings’.
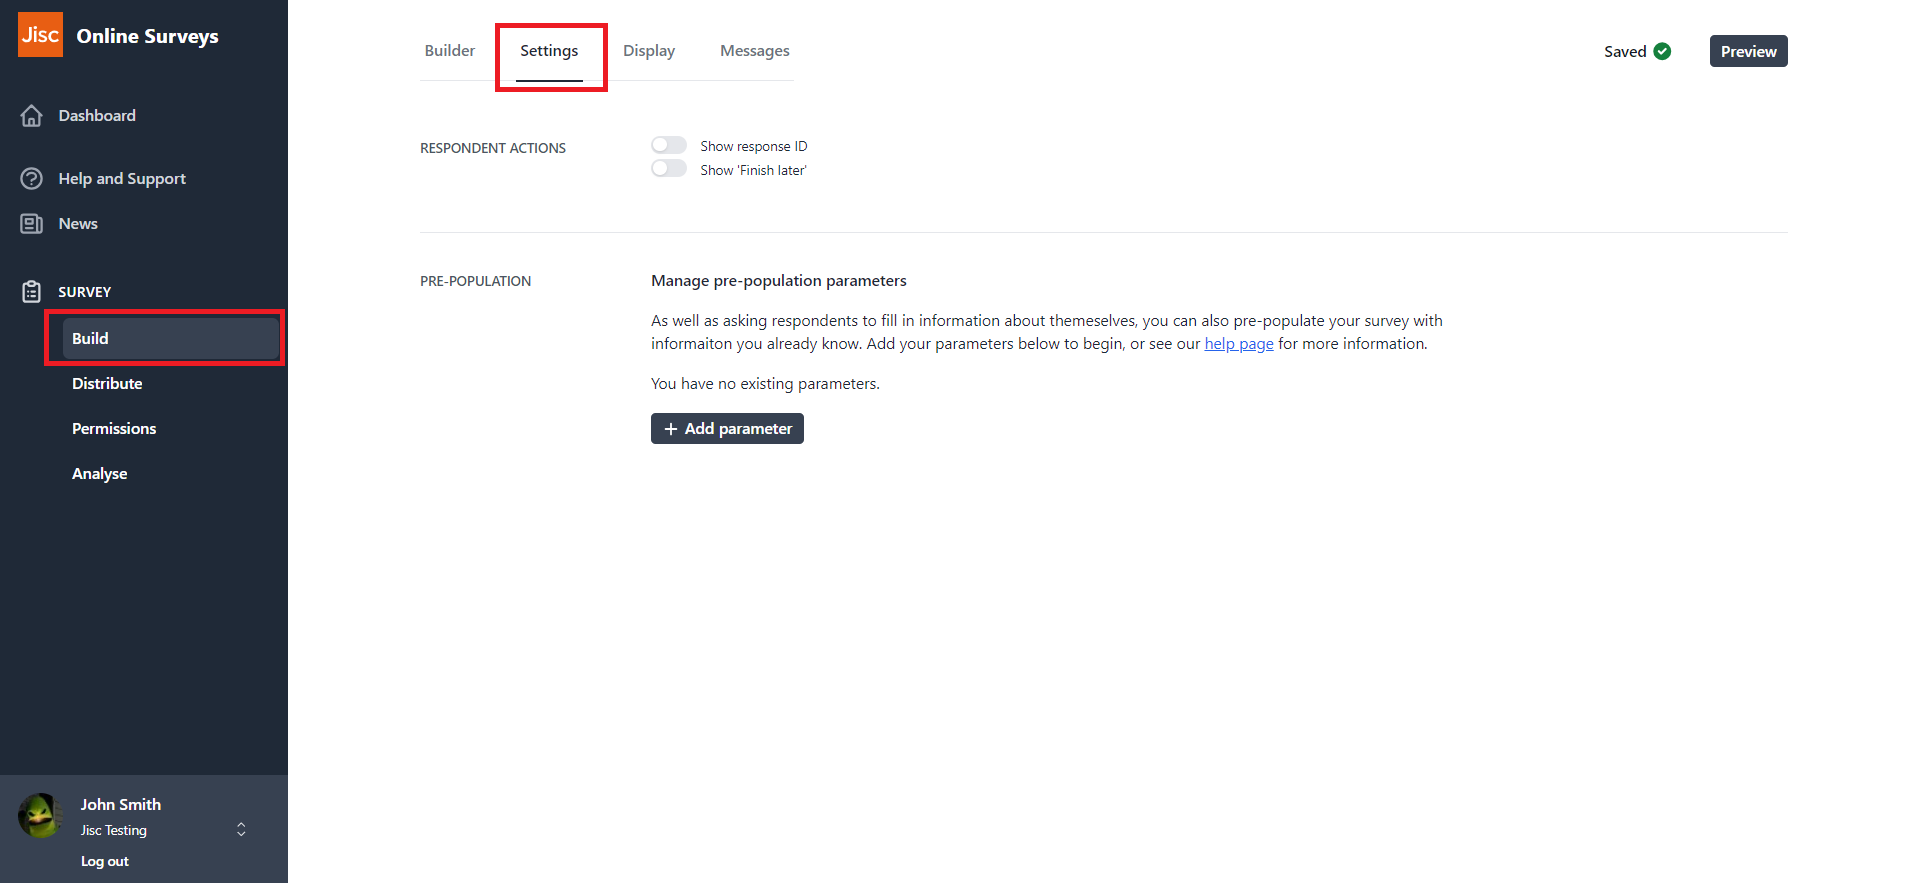
Survey settings
- Show response ID: displays a response ID on the final page that your respondent can copy to their clipboard.
- Show “Finish Later:” allows your respondent to save their place in the survey and return later via a unique URL. (Read more)
- Show response PDF: allows your respondent to download a copy of their responses (this will include any pre-populated values).
- Show Previous button: allows the respondent to return to previous pages.
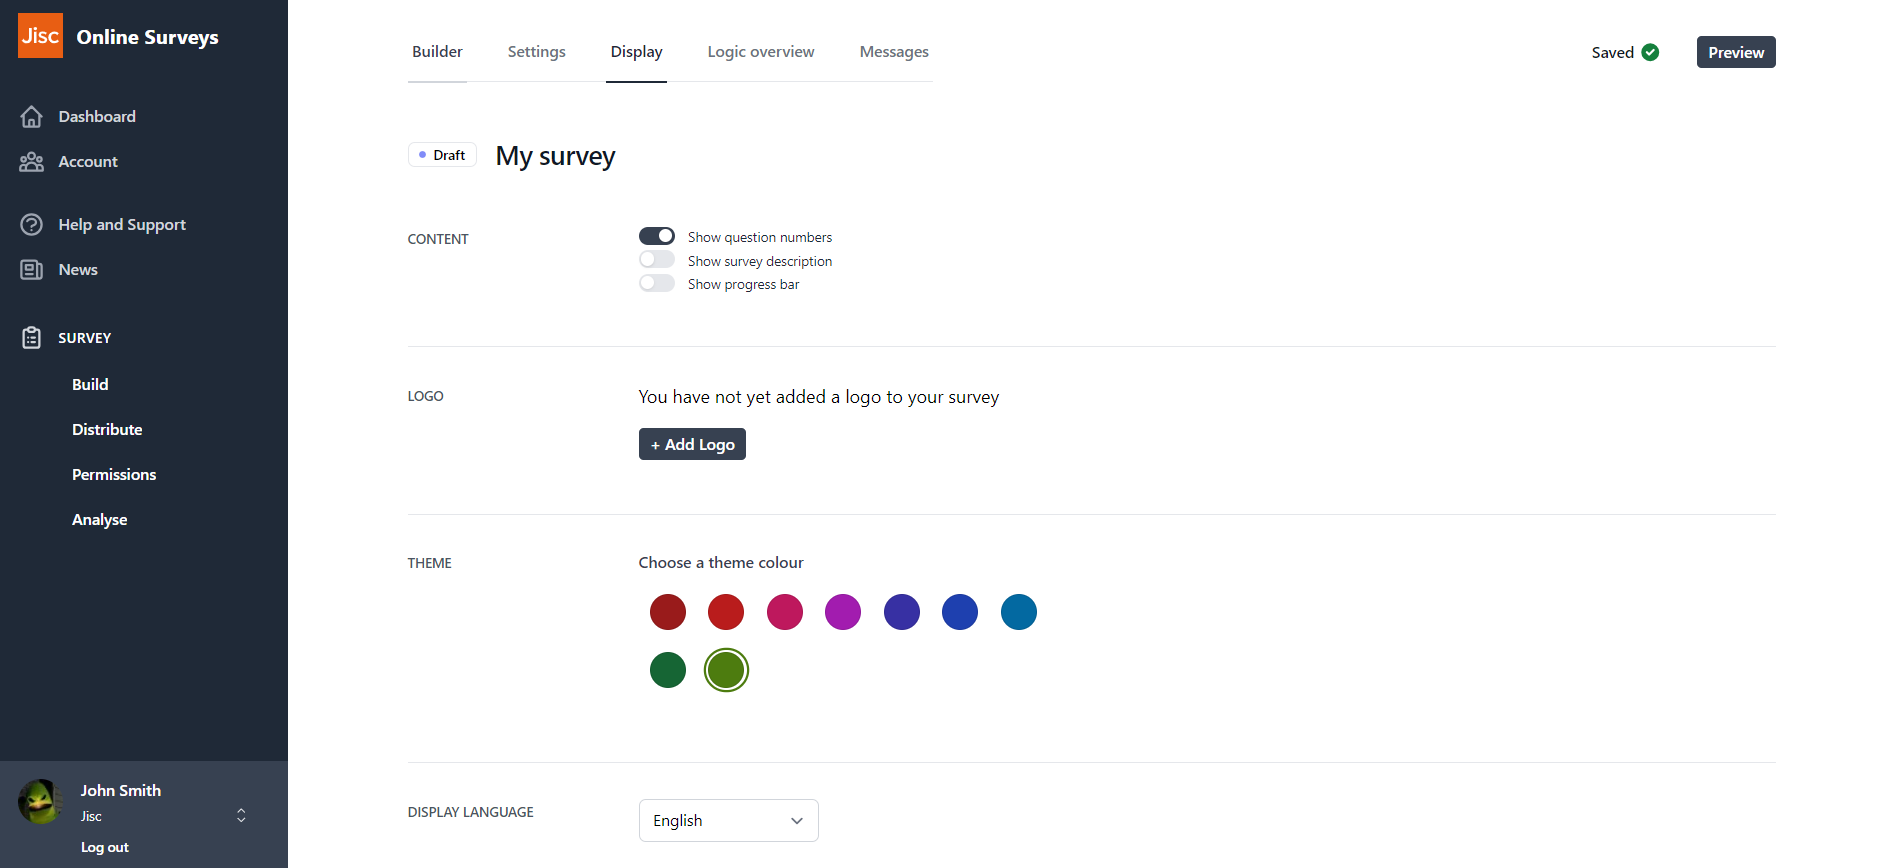
Display settings
- Show question numbers: determines whether or not the survey’s question numbers are displayed to your respondents.
- Show survey description: N/A
- Show progress bar: determines whether a progress bar is displayed for your respondents.
Distribution settings
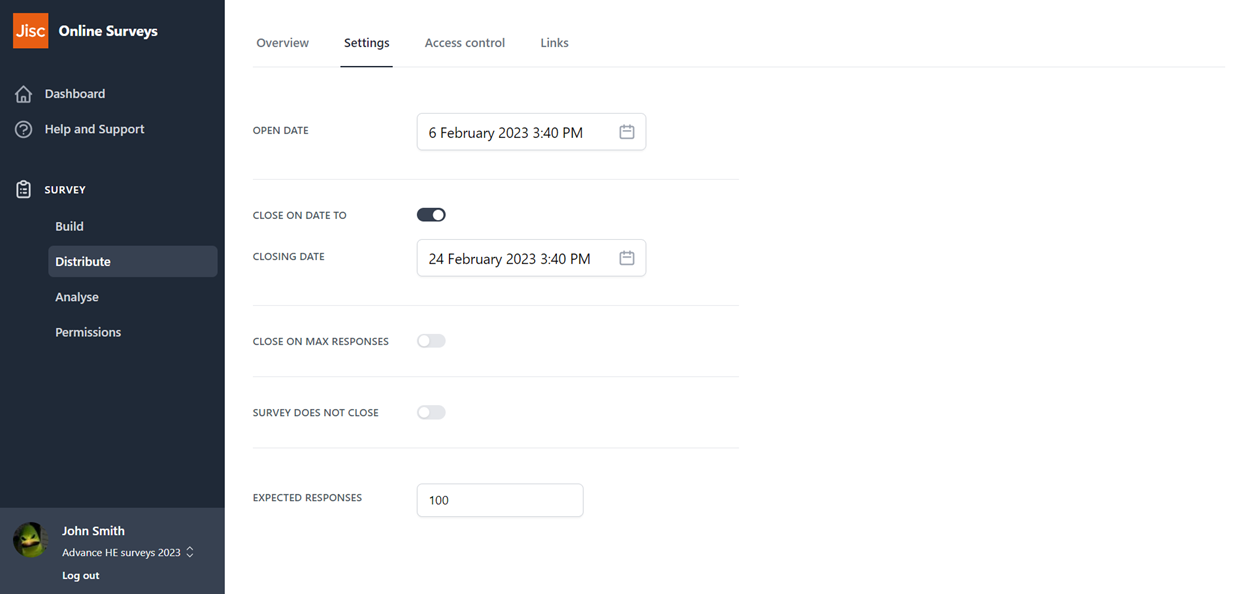
Once you have finished editing your survey, you’re ready to set your surveys distribution settings.
Go to the ‘Distribute’ area of your survey and choose the ‘Settings’ tab at the top of the page.
All you will need to do on this page is set an open and close date for your survey using the date and time pickers. (Bear in mind Advance HE’s determined windows for each survey.)
Set your survey's URL
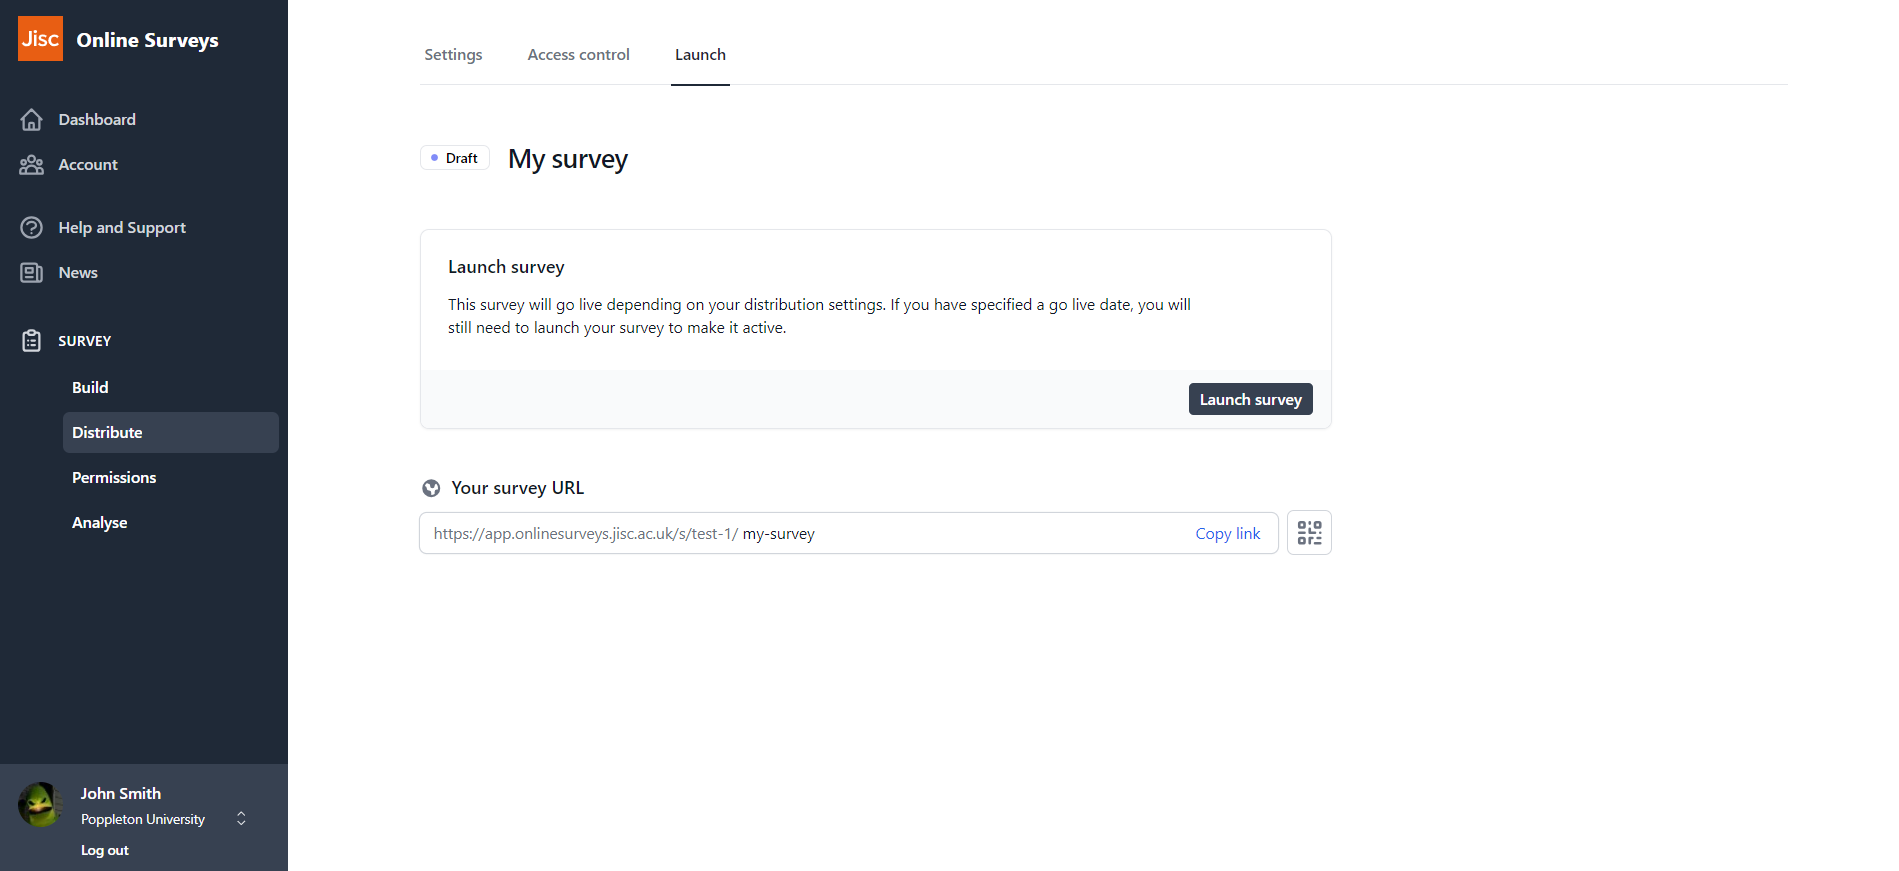
You will have already set a survey short name when adding the template to your Dashboard. But you can review this by going to the ‘Launch’ tab in the Distribute area.
Your survey URL will be displayed here. You can change the final part of the URL by clicking into the textbox.
Your survey URL will be formatted:
app.onlinesurveys.jisc.ac.uk/s/[account-short-name]/[survey-short-name]
This URL will have a token appended to it for your respondents so that their responses can be tracked and their pre-population values are collected.
Launch your survey
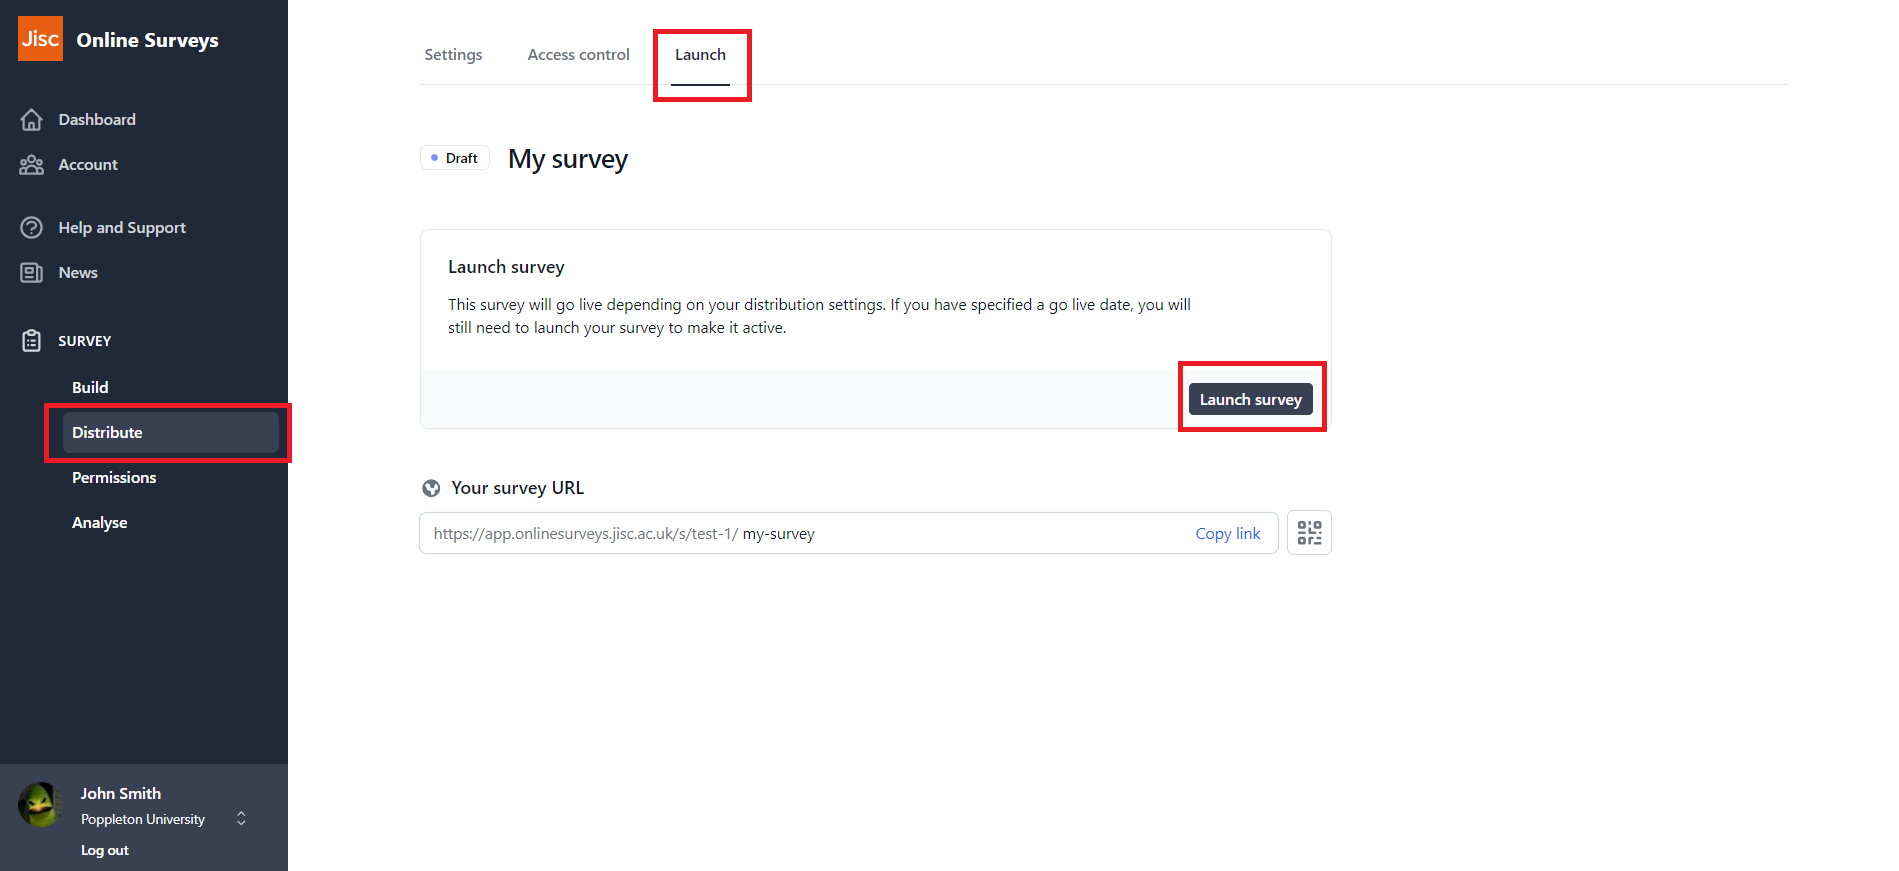
To put your survey live, go to Distribute > Launch.
Click the ‘Launch survey’ button.
Your survey status will now change to ‘Open’, unless you have set your open date in the future, in which case it will be ‘Scheduled’.
Note that you will be prevented from issuing invitation emails until your survey is launched.
Create your respondent list
You will need to prepare your respondent list in a spreadsheet and save it as a csv file ready for uploading into Online Surveys.
You should refer to the coding guide provided by Advance HE to understand how to format this list for each survey (they will all be different).
The list will consist of columns with credential and pre-population values. Each respondent will occupy a row.
Some questions in each survey have been set up to receive values via your respondent list, if you know the values in advance. This means that those questions will be automatically populated instead of being shown to your respondents.
The questions that are set up to receive pre-population values are identified in the Builder by the pre-population label as a tag above the question number. The question visibility rule is also displayed.

In some cases, these pre-population values will determine logic in the survey. For example, you can choose a value to determine which pages are shown to specific respondents.
It is mandatory to upload an email address for each respondent. This is their primary key and will also allow you to issue a survey invitation. The email must always be in always the first column.
The pre-population columns can be added in any order, but must have the correct pre-population label in the header. These header labels are lower case, and are defined in the coding guide. The values for these columns must match the pre-defined list in the coding guide too. This is because, many of the pre-populated questions are quantitative, so will have a pre-determined list of answer options.
There will always need to be a populated email column. This is your respondent’s unique ID and will allow you to issue invitation emails through Online Surveys. In addition, you can optionally add and populate the columns ‘respondentId’ and ‘password’ – this will allow you to provide meaningful credentials to respondents if you choose to issue the public URL of the survey instead of, or in addition to, the unique URLs. If a respondent follows the survey’s public URL, they will be presented with a form to log in with a respondent ID and password. If you do not add or populate the ‘respondentId’ and ‘password’ columns they will be auto-populated with the respondents’ email addresses and randomly generated passwords; this can be ignored if you don’t intend to use them. Please note that the email addresses, ‘respondentId’ and ‘password’ will not be included in responses downloaded from Online Surveys. If you wish to have an identifier associated with responses then you will need to populate ‘studentid’.
Tip: A standard csv file can’t encode special characters when transferring data between systems. If you are uploading a respondent list with Welsh parameter values, or if you are uploading country names with accented characters, choose instead ‘CSV UTF-8 (Comma delimited).’ UTF-8 is capable of encoding all special characters.

Upload your respondent list
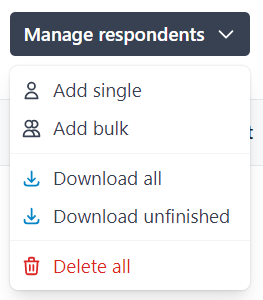
To upload your respondent list, navigate to the ‘Access control’ tab in the Distribute area and select ‘Email list’. Once the ‘Respondent list’ has loaded, click the ‘Manage respondents’ menu and choose ‘Add bulk/edit bulk.’
Browse for your saved csv file and click ‘Upload’.
Your respondent list will now be populated.
If you receive an error, you should check that you have formatted your csv correctly:
- Check that you have uploaded validly formatted email addresses.
- Check that you have labelled the header rows correctly.
- Check that any pre-population values that are intended for a Choice or Dropdown question match the permitted values in the coding guide.
Anonymity setting on your respondent list
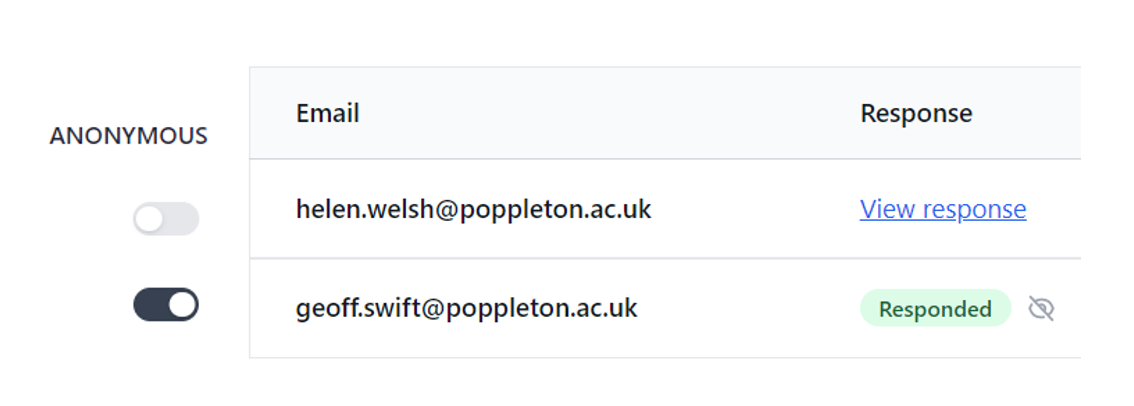
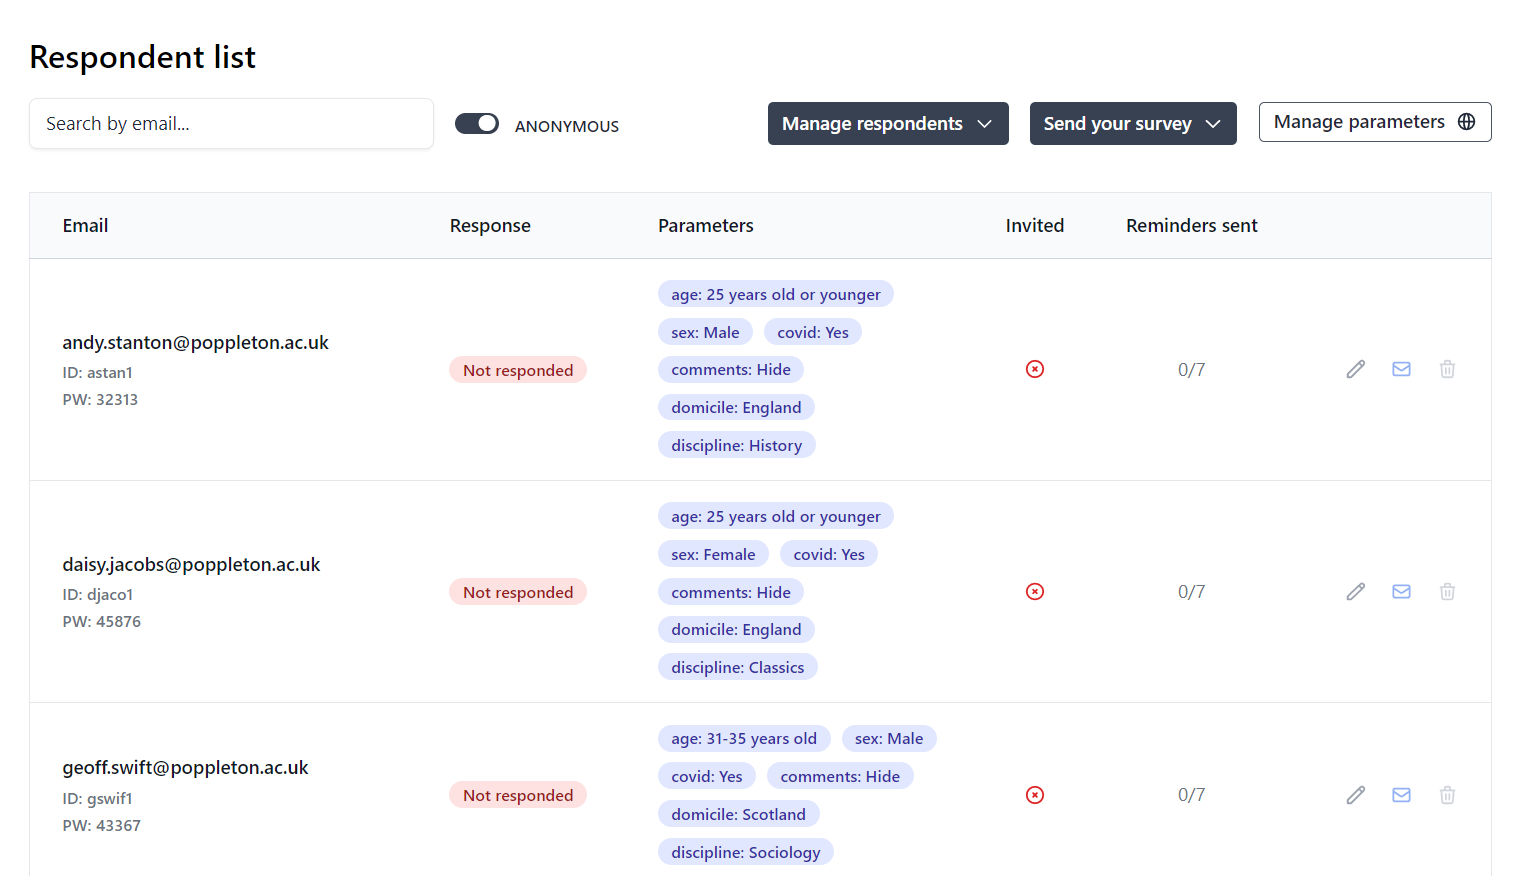
The anonymity toggle on your respondent list will determine if you are able to view a respondent’s individual response via a link in the list.
If you are conducting your survey anonymously, ensure you have toggled this setting on.
This will not affect your ability to export unfinished respondents or issue reminder emails.
Distribute your survey
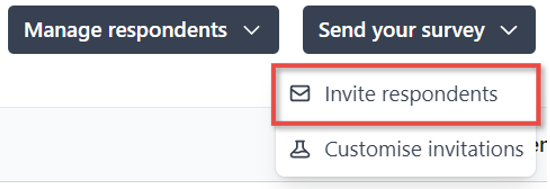
The easiest way to distribute your survey is to issue the survey via email through the application.
Clicking this button will issue an invitation with the respondent’s unique URL.
You can send a maximum of eight invitations to each respondent. Clicking this button will issue invitations to any respondent who has not reached that limit or who has not yet respondend to the survey.
You can also issue individual invitations by clicking the envelope icon on the respondent row.
There is no limit the number of invitations you can issue in one go. But note that when issuing a large amount this may take a few minutes and display a progress bar. Do not refresh the page while this is progressing.
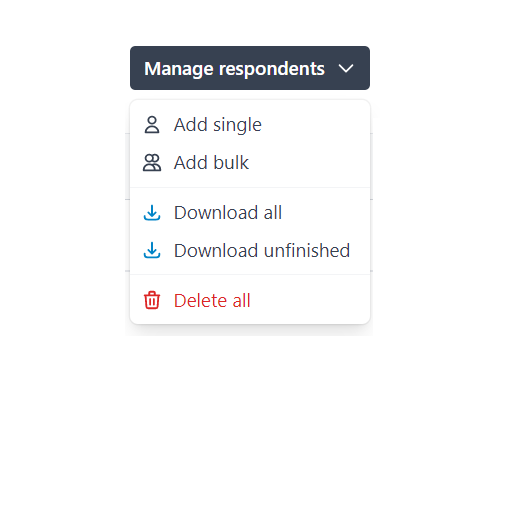
Alternatively, you can download your respondent list via the Manage Respondents menu.
This will provide the respondents’ email addresses, along with their unique URLs, so that you can issue the links via your own email client.
Download all will download all of your respondents’ URLs in a csv file, regardless of whether they have completed the survey or not.
Download unfinished will download the URLs for respondents who have not yet submitted a response. This can be used for issuing reminder emails via your own email client.
You may prefer this method so that the invitation comes from a recognised domain, or so you can tailor the email content for your audience.
Tip: you can also use this function to export and test some of your URLs before issuing any invitations.
If you’d like to issue the public URL to your population, you can do this through your own means by copying the URL from the Links tab to your clipboard.
Respondents will be presented with a login page, where they can enter their Respondent ID and Password. See the ‘Create your respondent list’ section above to see how to upload meaningful Respondent IDs and passwords.
