In this article
Survey permissions
You can share access to your survey with any other registered user in your account.
Creating permissions
There are three ways to create new permissions to your survey:
- Create single: allows you to give access on an individual basis.
- Create bulk: allows you to add multiple emails in the same action.
- Upload CSV: allows you to upload a CSV of users.

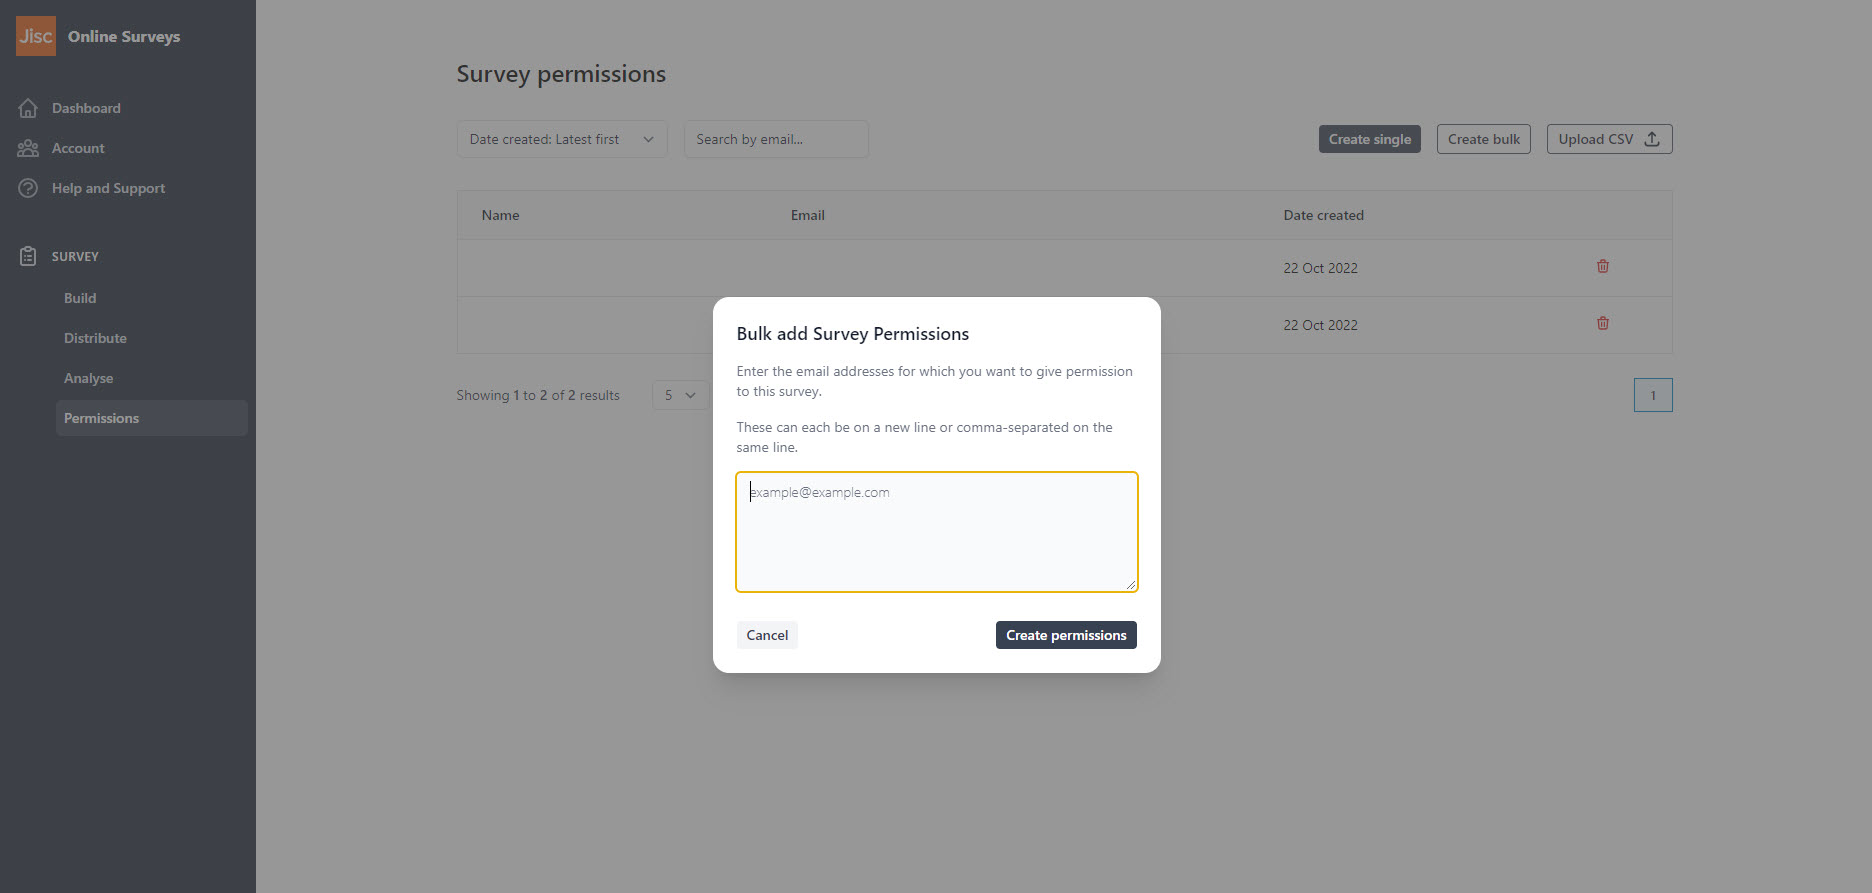
Create bulk
To give multiple colleagues access, select the Create bulk button.
A pop-up will appear. Enter the email address of each user you wish to give permission to the survey.
These can either be a single email per line or comma-separated on the same line.
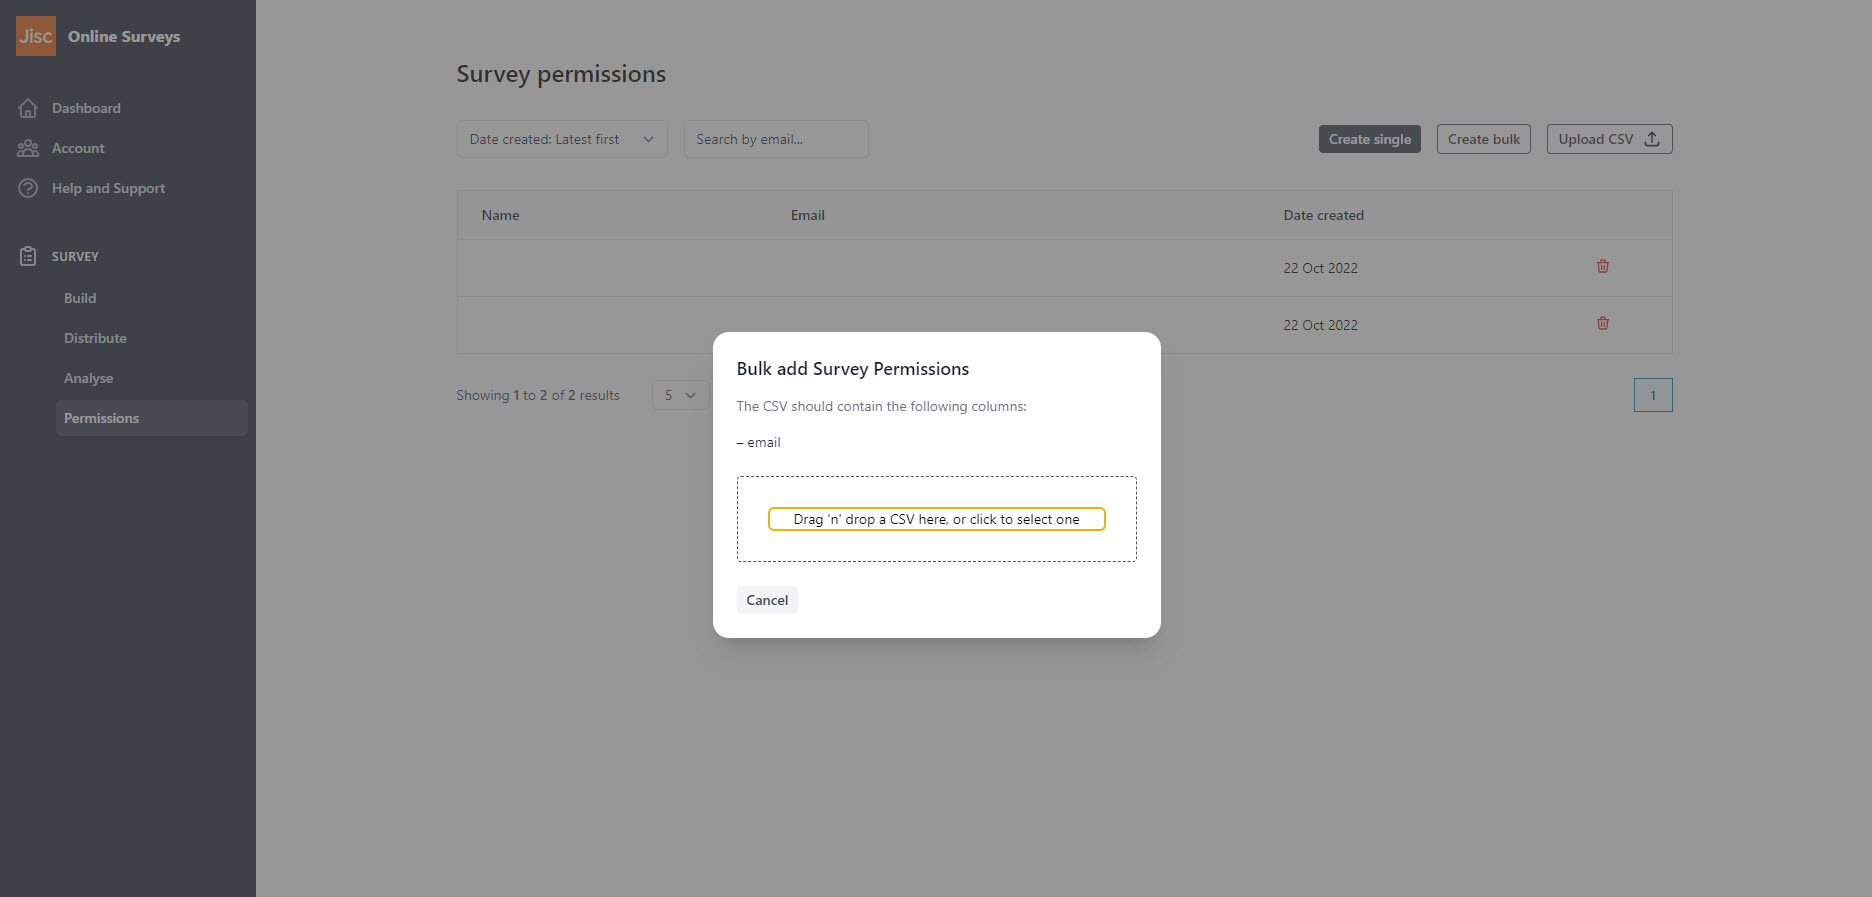
Upload CSV
To give multiple colleagues access select the Upload CSV button.
A pop-up will appear. Click to browse for your CSV file, or drag the file in to the pop-up.
The CSV file will just need to contain one column of email addresses under the header “email”.
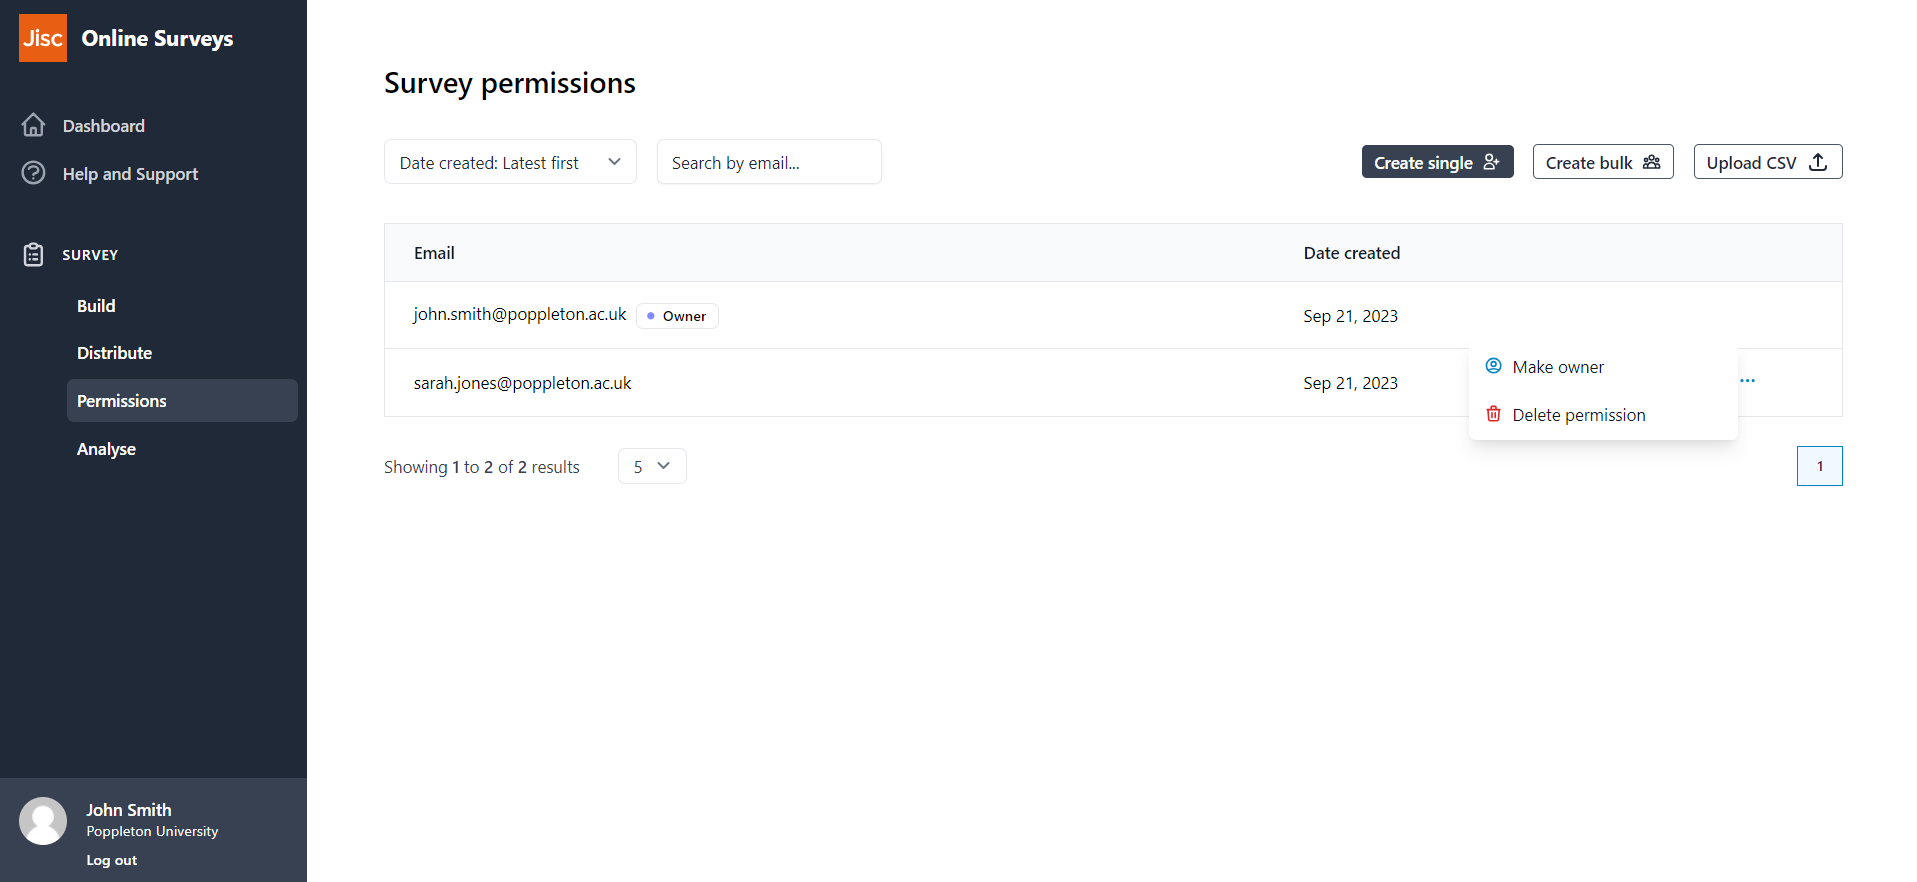
Deleting permissions
To remove a user’s permission from your survey, click the three dots on the user’s row in the permissions table.
Select Delete permission.
Related articles
Survey permissions
This help page explains how to give permission to other users to access your survey.
Read MoreChanging a survey’s owner
This help page details how to change the email address associated with your user account.
Read More